Pages

Sunday, August 3, 2014

Olive Oil Spaghetti

Last night was a busy night! I decided on something simple and light; I came up with Olive Oil Spaghetti


Ingredients:

-1 box whole wheat spaghetti
-Olive Oil
-Basil
-Tomatoes
-Garlic
-Salt & Pepper
-Parmesan Cheese

Directions:

1) Cook spaghetti according to box instructions with a bit of olive oil.
2) Drain, portion, add all other ingredients to taste.

It's that simple, folks! And it was very tasty! I also made some bruschetta (you can find that recipe here). Super easy dinner :)

That's all for today. Tonight for dinner we're just having plain ol' tacos. Trying to use ingredients at home ;) have a blessed day, y'all!


Friday, August 1, 2014

Spicy Hibachi Chicken & Chicken Fried Rice

Honestly, I'm not a big fan of Japanese or Chinese cuisine. Mostly because it's a lot of fish...and I don't like fish! The chicken dishes I can usually handle, although I usually find them too bland. Oscar, on the other hand, LOVES Japanese and Chinese. From Sushi to shrimp to Orange chicken...he'll eat it all! We don't go to those types of restaurants very often though because there are more things that we both enjoy, but on Oscar's birthday, every year, we all go to Benihana.

Here are some pictures of us there on his last birthday in March: 

Oscar in Chloe's hat ;)

Oscar and Chloe

Our chef. He was a lot of fun and really took to Chloe and tried to get her interested.

The whole family. My mom and dad, Me, Chloe and Oscar.

When we were at Benihana in March I tried something new, the spicy hibachi chicken, and I really enjoyed it! And the chicken fried rice, of course, is ALWAYS good. So now I won't dread out trip to Benihana next year! ;) lol! 

Starting in the fall, Chloe will be going to a Christian school. We are so excited for her because we know this is the best decision for her at this time, but the extra expense is something we weren't planning on as this was sort of a last minute decision. Oscar has been putting in so many extra hours lately trying to make ends meet since I can't start back to work until school starts later this month. He's been so good about it, willingly giving his days off to put in extra hours at another store. I wanted to do something little to thank him. So, I took to pinterest and found some "copy-cat" Benihana recipes! And, oh my goodness, did they turn out good! I will definitely be making again soon! We ate every last bit of it! 

So without further ado...the recipes!

Spicy Hibachi Chicken


(This is not my image, unfortunately in all the excitement to eat I forgot about pictures) :(
Link

Ingredients:

1 lb boneless skinless chicken breasts (I used fillets)
1 tbsp vegetable oil
1/2 tbsp Sesame Seed Oil
3 tbsp Soy Sauce
4 tbsp butter
2 tsp lemon juice
1-2 tsp cayenne pepper (I used 2)
salt and pepper to taste

Directions:

1) Wash chicken and dry. Cut into bite-size pieces. 
2) Heat vegetable oil and sesame seed oil in a large frying pan over medium-high heat
3)Add chicken, soy sauce, butter, lemon juice, salt and pepper, and cayenne pepper to skillet
4) Saute for about 6-10 minutes (until no longer pink); Stir well to mix all ingredients.

Chicken Fried Rice

Best Copycat Benihana Japanese Chicken Rice. Photo by Chef Simply Delish
(Again, not my picture. I actually didn't use the peas and carrots.)

Ingredients: 

1 lb boneless skinless chicken breast (again, I used fillets)
4 cups cooked white rice
4 tbsp butter, softened 
2 cloves garlic, minced
1 tsp sesame seed oil
3 eggs, beaten
2 tbsp sesame seed oil
1 cup onion, diced
1/4 cup green onion, finely chopped
2 tbsp soy sauce
salt and pepper to taste

Directions:

1) Cook rice according to package instructions. Put in freezer or refrigerator to cool to room temperature. 
2) Mince garlic. In a bowl, soften butter. Mix garlic and butter. 
3) Wash and dry chicken. Cut into bite-size pieces.
4) Scramble eggs in frying pan with 1 tsp sesame seed oil, cut into small pieces and put aside.
5) In a large frying pan add 2 tbsp sesame seed oil and cook the onion on medium-high heat for about 5 minutes. 
6) Add chicken, and add salt and pepper to taste. Chicken should take about 5-10 minutes to cook. 
7) Add 1 tbsp of your garlic butter mixture.
8) Start adding a couple of handfuls of rice into the chicken and onions, pour rest of butter garlic mixture in as you add the rice. Stir well so everything gets well mixed. If desired, add more salt and pepper now. 
9) Add soy sauce. Mix well so everything is evenly distributed. 

And your done! The rice definitely took longer. I made it first and put it on another burner on low heat while I made the hibachi chicken so that it wouldn't get cold. But it was all SO good! Next time, I think I'll make a bigger portion of the hibachi chicken because it was gone in a snap!

Arigato Gozaimasu!
 Enjoy!


Thursday, July 31, 2014

Doritos Casserole

My husband's favorite kind of chips is Doritos, so when I saw this recipe on Pinterest I was excited to try it! Plus, I figured the Doritos tacos at taco bell are pretty good and pretty much the same concept right?

Before I get started, I want to say that I wasn't CRAZY about this dish. I felt like after being baked the Doritos on top became too chewy and didn't really taste like Doritos anymore, which defeated the purpose of the dish. I did; however, really like how the beef mixture (ground beef, sour cream, salsa, cheese) turned out. So, because of that...and the fact that I really want to make this dish work for Oscar...I will try it again. Next time, though, I will make the casserole then crumble the Doritos on top after it's baked. I may add tortillas in there place in the casserole. I'll let you know when I try it :)

But, for today, I'm going to put the recipe here as I made it last night:

Layered Doritos Casserole!

Ingredients:

1 "Party" size bag Doritos
1 lb ground beef or turkey
1 pkg shredded Mexican blend cheeses (2 cups)
1 cup salsa
1 cup sour cream
1/4 red onion, diced
1 clove garlic, minced
1 pkg taco seasoning

Optional:
Tomatos, lettuce, sour cream etc to top. (we just used sour cream)

Directions:

1) Brown ground beef or turkey, drain off grease
2) Add onions, garlic, and taco seasoning. Add water according to taco seasoning pkg.
3) Stir until thickened then turn heat down to simmer
4) In a large bowl, mix salsa, sour cream and 1 cup of cheese
5) Add ground beef to the mixture in the bowl, mix in.
6) On the bottom of a 9x13 baking dish, lightly crush Doritos until covered
7) Spread ground beef mixture over the layer of Doritos
8) Make another layer of Doritos over mixture.
9) Top with 1 cup of cheese
10) Bake covered for 30 minutes

So that's it! Whenever I make it again I'll give you an update. I think on the bottom I'll use tortillas, then the beef mixture, top with cheese, bake, then crumble Doritos on top! 

Have a Blessed Day!!! 


Monday, July 28, 2014

Cheesy Bowtie Skillet & S'mores Dip

Tonight I was feeling ambitious, so I decided to take this dish I found on Pinterest and make it my own! The result was actually really good!

Cheesy Bowtie Skillet
(Picture doesn't really do it justice!)
Ingredients:

1 box whole wheat bowtie pasta
1.5 jars marinara sauce
1/4 small onion
1 clove garlic
Basil flakes
Olive Oil
Mozzarella Cheese

Directions:

1) Cook bowtie pasta according to box instructions with a bit of olive oil.
2) Pour a bit of olive oil into a pan (so that it coats the bottom) turn stove on low/medium heat and let the oil get hot. Saute onions and garlic in the oil for about 5 minutes.
3) Add marinara sauce to the onion, garlic and oil. Turn heat up a bit and stir until bubbling slightly.
4) Drain pasta and pour unto a medium sized pot.
5) Pour sauce over pasta. Move the bowl onto the heated stove and stir.
6) Add mozzarella cheese (about 2 handfuls) and stir in until melted
7) Add a bit of basil flakes and stir in

YUM!

Well, dinner was great! We all enjoyed it! My dad would have eaten more, but I told him we had to save some for Oscar (who was still at work!). But after dinner, I had a bit of a sweet tooth. Yesterday evening, I tried to make Flan. I was doing great until my mom went to put the eggs back in the fridge for me and informed me that they were dated JUNE 3RD! Grrr! I didn't have the ingredients to start over. I went ahead and baked it just to see how it would turn out. I don't know if the bad eggs played a part in it, but it didn't turn out too well. I think it over cooked a little. I planned on trying it again tonight...but after cleaning up from last nights attempt...I really didn't want to mess with it. So, I started looking through the pantry to see what else I could find...here's what I came up with :)

S'mores Dip

This was another pinterest recipe I found...super easy!

S’more Dip photo
Link (Note: Mine did not come out looking this pretty. I think they must have not stirred the marshmallow creme in all the way. But if you don't stir it in you won't get a uniformed flavor. Besides, pretty doesn't really matter when it comes to CHOCOLATE! ;) )

Ingredients:

1 bag (12 oz) semisweet chocolate chips
1/2 jar marshmallow creme
1 (14 oz) can sweetened condensed milk
graham crackers

Directions:

1) Pour condensed milk and chocolate chips into a microwave safe bowl
2) Microwave for about 2 minutes or until chocolate chips are melted. Stop after about 1 minute and stir
3) Take out of microwave. Add Marshmallow creme and stir in.
4) Microwave for another 30 seconds.
5) Stir and serve warm with graham crackers for dipping

This was SO good...TOO good...I ended up with a tummy ache after! lol!
Really, you could dip ANYTHING in this. For the s'mores effect, obviously graham crackers is best. But Chloe dipped a few animal cookies in it. Pretzels would probably be good too! Or even strawberries or apples! Yum! (Fruit would be good...maybe that would take away some of the guilt ;) )

That's all for tonight!

Love & God Bless!

Saturday, July 26, 2014

Baked Cheesy Pizza Spaghetti

Well, I WAS going to make "Taco Dogs" tonight, but I ran out of time and didn't want to go to the store so I decided to make do with what we had at home!

I kind of combined to of our favorites so far: Baked Spaghetti and Pizza Casserole.

(This is my best attempt at food photography)

Ingredients:

1 box whole grain spaghetti
1 1/2 24oz jars marinara sauce
Mixture of Mozzarella and Cheddar cheese (to taste)
Pepperoni 
Olive Oil

Directions:

Preheat oven to 375 degrees

1) Cook spaghetti with some olive oil according to package instructions.
2) Put spaghetti in a 9x13 baking dish, mix in marinara sauce and cheeses
4) Rip up some pepperonis and stir in.
5) Top with mixture of cheeses
6) Lay pepperonis on top and bake for 20-30 minutes

That's it! Pretty much the same thing as the baked Spaghetti...just added more sauce and pepperoni! 

Really good, too! The pepperoni is a little thing that adds a lot of flavor! 

Not sure what I'm doing for tomorrow, I may try the taco dogs...but there are some chicken dishes I really want to try too!

Blessings!

Friday, July 25, 2014

Recipes - Nights 1-5

I will normally just post an update every time I try a new recipe, but since I've only just recently started so I figured I could back up and do the first 5!

First, let me tell you how this all got started. If you read the about me section, I give a little more history. But basically what happened is I was looking at pinterest one night and started pinning recipes...which is kind of funny because...I don't cook. My husband looked at my computer and laughed and asked why I pinned so many recipes when I never cook. He wasn't being rude, but I took some offense to this! I took it as a challenge and said from now on I'm going to make a pinterest recipe every night. I don't think he really thought I'd do it. He just said okay. But I've taken this challenge very seriously for the last week! What I've found is...I really ENJOY cooking! Granted I still have a lot to learn (I had to look up how to mince a clove of garlic!), but it's a fun learning experience and Chloe is having fun "helping" as much as a 6-year-old can help!

Since this challenge has started I have become even MORE obsessed with Pinterest than I already was! Yup, I'll admit it, I'm a pin-a-holic! But that's the beauty of technology! 10 years ago you'd have to take classes, buy cook books, go to the library to learn to cook. Now I can pin recipes from my phone, print them, watch youtube videos when I don't understand something and I'm good to go!

So here we go. I will post the recipe name, picture, and credit to where I originally found it. Then I will post the ingredients and directions based on how I made it, and reviews from my family. Currently, my little family lives with my parents until we are both done with school. I am in school to be an elementary school teacher and Oscar is in school to be a Pharmacist, so we have 4 people tasting and giving opinions (IF Chloe actually tastes something, it MUST be good!)

Night One: Chicken Enchilada Casserole 

easy-chicken-enchilada-casserole-1-9


Ingredients:

1 14 oz jar Enchilada sauce (or green verde sauce)*
2-3 cups shredded Monterrey Jack cheese (eye-ball this to taste. We used a lot more cheese, but I didn't measure it exactly)
6 large whole wheat tortillas
1 pckg boneless, skinless chicken breast fillet (4 in pckg)

Optional:
-Rotel 1-2 cans
-Refried beans

Directions

- Preheat oven to 375 degrees -

1) Cut each fillet into smaller pieces so that it cooks faster and put into a small pot. Pour enchilada sauce (or verde sauce*) over it and cook covered on low to medium heat until chicken is cooked through, about 20 minutes. No water is needed! The chicken will cook in the sauce. Make sure you stir occasionally so that it doesn't stick to the bottom.

2) Remove Chicken from the pot and shred with two forks.

3) Start layering the casserole. Start with about 1/4 cup of leftover sauce, cover the bottom of the baking dish (9x13 casserole dish). Then place 2 tortillas on the bottom, top with about 1/3 of the chicken and 1/3 of the remaining sauce. Sprinkle with 1/3 of the cheese (or to taste) and repeat starting again with 2 tortillas, then chicken, sauce, cheese. (add rotel and refried beans to these layers if desired)

4) Bake for 20-30 minutes, uncovered, until bubbly and cheese has melted and started to brown on top.

This dish, made the way the original recipe said, was only so-so. However, when we reheated left overs we topped it with salsa verde and it was really good! We all agreed that the enchilada sauce on it's own didn't add much flavor and it wasn't spicy enough for a mexican dish. If I make it again, I will skip the enchilada sauce and use the salsa verde instead. I will also add refried beans and rotel to my layers to give it some more flavor.

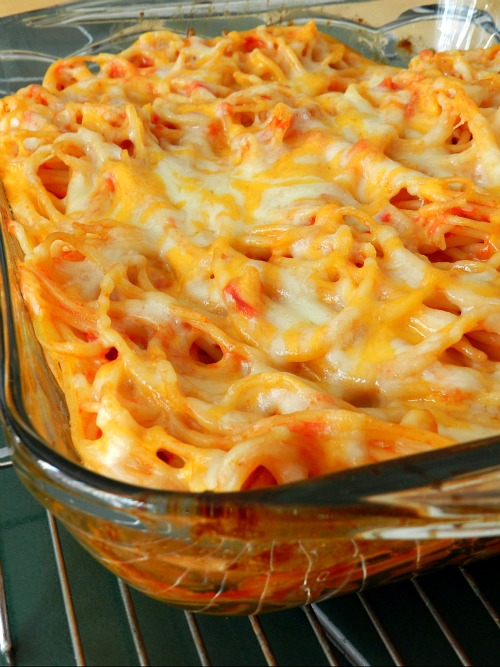
Night Two: Baked Spaghetti 


Ingredients

1 1/2 - 2 jars spaghetti sauce
1 package whole wheat spaghetti
Mozzarella and Cheddar cheeses, to taste. (The recipe says 2-3 cups...I'm not sure how much we used exactly)

Directions

Preheat oven to 350 degrees 

1) Cook spaghetti per package instructions with just a splash of olive oil

2) Drain water and mix spaghetti with sauce and (1 cup of) cheese in a 9x13 baking dish.

3) Top with cheese 

4) Bake for 20 minutes or until cheese is golden and bubbly. 

This was a really good dish! We used 1 1/2 jars of sauce and all agreed it could have used just a bit more so next time I'll use 2! But other than that, it was a winner! There were no left overs :)

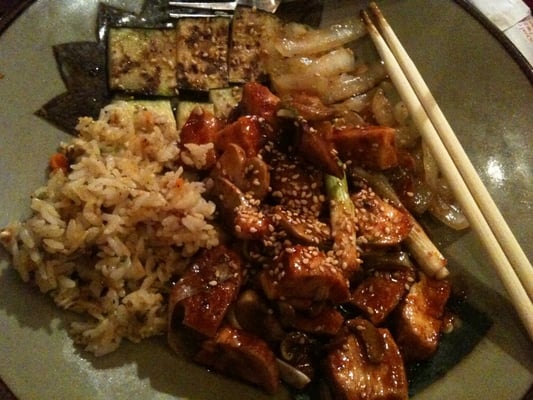
Night Three - Taco Skillet 

I'm not going to spend much time on this one because we didn't enjoy it. We all agreed we would have rather just had normal tacos. I will say, the concept of adding pasta to the taco meat I thought was strange, but actually tasted okay! It was just mixing everything else in all in one skillet that we didn't end up liking. 

Taco Skillet Dinner

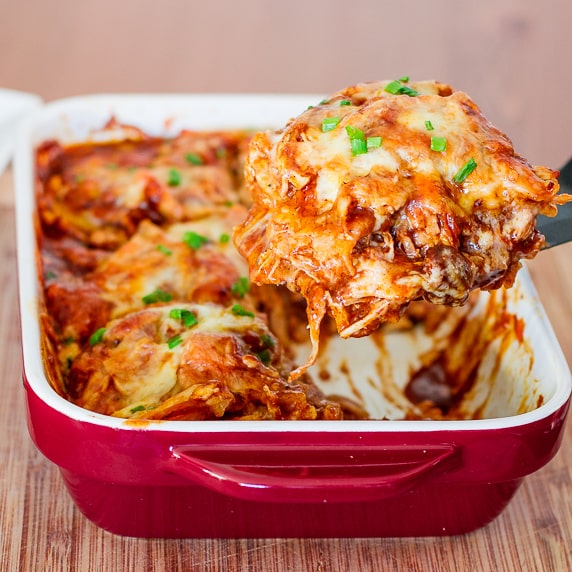
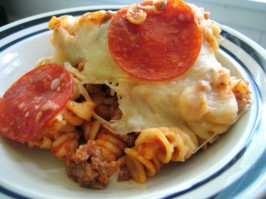
Night Four - Garden Bruschetta and Pizza Casserole

This has been, hands down, the best one yet! 


Pizza Casserole Ingredients:

1 lb ground turkey
1/2 large onion, chopped (I used red)
1 clove garlic, minced
1 tbsp olive oil
1/2 tsp Italian seasoning
1 1/2 (24 oz jars) marinara sauce
1 1/2 cups Rotini pasta
Mozzarella cheese (recipe says 2 1/4 cups, again, to taste)
About 4 oz Pepperoni 

Directions:

Preheat oven to 350 degrees

1) Brown ground turkey, onion, garlic and Italian seasoning in olive oil

2) Drain, put in 9x13 baking dish

3) Stir in cooked pasta, marinara sauce and cheese. 

4) Rip up about 10 pepperonis and stir them in as well.

5) Top with cheese and pepperonis

6) Bake uncovered for 25-30 minutes


Garden Fresh Bruschetta
Garden Bruschetta Ingredients:

4-5 tomatoes diced small
1 clove garlic, minced
1/4 cup fresh basil, chopped fine
3 tbsp olive oil
1 tbsp red wine vinegar
1/2 tsp each of salt and pepper (or to taste)
1 baguette

Directions:

1) Mix all ingredients and let stand at room temperature for 2 hours (Honestly, I only let mine sit for 30 minutes and it was delicious)

2) Slice the baguette, brush with olive oil and lightly toast. Rub each side of toasted slice of baguette with a clove of garlic

3) Top with Bruschetta and enjoy!

BOTH of these recipes were extremely good. We devoured all of the bruschetta very quickly and agreed that next time we will make double (as we still had baguette left over, but no mixture!) Will definitely be making these again soon! 

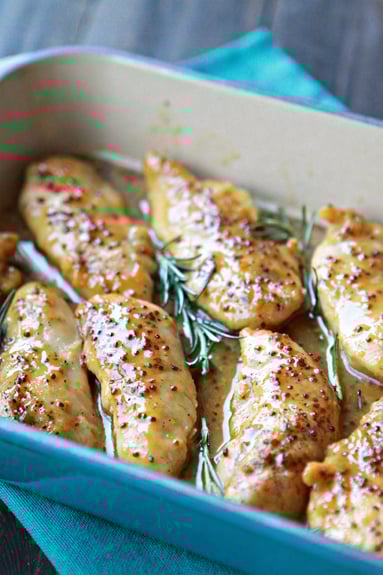
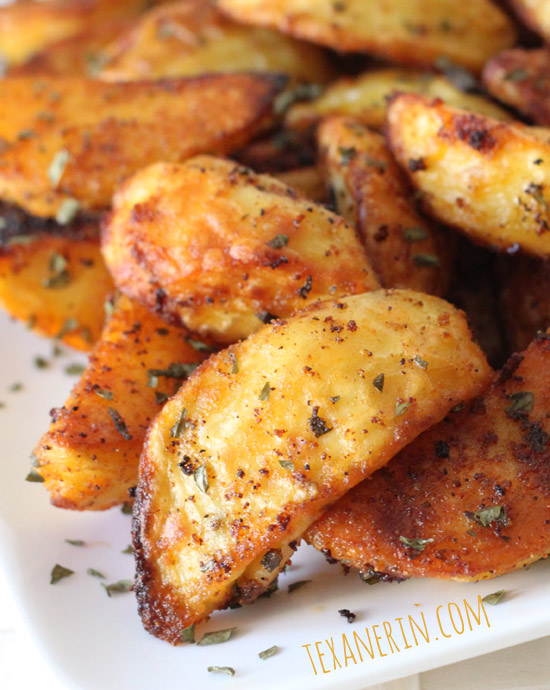
Night Five - Baked Honey Mustard Chicken & Spicy Potato Wedges

Easy Recipe for Baked Honey Mustard Chicken

Ingredients:

1/4 cup ground mustard seed
1/4 cup dijon mustard
1/2 cup honey
3 tsp olive oil
1/2 small yellow onion, diced
2 cloves garlic, minced
2 1/2 lbs boneless, skinless chicken tenderlions
salt and pepper
3-4 small sprigs of fresh rosemary

Directions:

1) Mix ground mustard seed, dijon mustard, honey, and olive oil into a small bown until smooth.

2) Put 1 tsp oil into a skillet and saute the sliced onions over medium heat until they become tender and translucent. Add the garlic and cook for another 2 minutes. 

3) Put onion/garlic mixture into a 9x13 baking dish with a pinch of salt and pepper.

4) Spread some of the honey mustard mixture onto the chicken and place in the pan. Place rosemary sprigs in the pan between the chicken tenderloins.

5) Cover the pan and bake for 20 minutes. 

6) Remove pan, smear chicken with remaining honey mustard sauce. 

7) Place pan back in oven, uncovered, for 20-30 more minutes until a brown scorch appears on chicken top. 

This recipe was pretty good. Oscar and I would have preferred not to have the rosemary at all. I don't think it really added anything and it ended up getting stuck to the chicken and we just took it off lol! But my parents didn't mind it. We all agreed the spread was pretty good...I thought it was a bit too sweet and would have added less honey, but everyone else enjoyed it! 


I made this one "to the book" so click the link for ingredients and directions.

We all enjoyed these! I served with a bit of lite ranch. They were spicy, but my dad and I loved them! Oscar and my mom thought they were a bit too spicy. Nevertheless, enjoyed by all :)


Whew! That's all for now! I'm not cooking tonight....Oscar is taking me out :) But Saturday nights recipe is Taco Dogs and Queso! Stay tuned :)

God Bless!


Frozen - A Household Obsession

So, if you have young kids (especially girls) you probably can fully relate to the title of this post. Frozen is an obsession. In our house, we live and breathe Frozen. One of the few autistic traits that my daughter still frequently displays is obsessing over certain things and memorization. This can definitely be seen in her Frozen obsession. Every morning she comes in my room, flops on my bed and says "The sky's awake...so I'm awake...so we HAVE to PLAY!" I must respond appropriately (as Elsa)...or ELSE! She also frequently recites other lines from the movie, requests to watch the movie at least twice a week, ALWAYS has her Anna and Elsa dolls in hand, and can be witnessed singing "Let it Go" or "For the First Time in Forever" at least 5 times a day!

A few weeks ago, Chloe told me she wanted to be Elsa for Halloween. Thankfully, I have an AMAZING friend, Ashley, who is an aspiring fashion designer! She made Chloe an absolutely ADORABLE Twilight Sparkle (My Little Pony was our last obsession, it still is AN obsession...just not quite as much as Frozen) costume last year. 

...and she's going to make Chloe an Elsa costume this year!! I know it will be absolutely gorgeous! Message me if you'd like to get in touch with her for a Halloween costume for your little one...or yourself! 


So thankfully, I've got Chloe's Elsa costume lined up for Halloween...but she wanted something to be able to wear right now...around the house. So, I took to Pinterest (you will learn that pinterest is one of the biggest lifesavers for me!). I've never been real crafty. Ever. To be honest, in elementary school I was always so self conscious about my artwork that, if it was a take home project, I'd have my dad help me with it! But, I decided with pinterest and youtube I could make something work! After lots of research, I decided I could manage a tutu! The first result was underwhelming, but Chloe LOVES it:

After finishing Chloe's...I decided I really enjoyed making it. I did some more research to perfect my technique and then made another. I was REALLY happy with the result:

So, I am officially selling tutus! A Frozen tutu is $35 (because of the special ribbon very hard to find, and the snowflake rhinestones). I'd love some custom orders, though! So tell me what you want and I'll make it happen! The tutu pictured is available. The band stretches to fit from a newborn to a size 5T (which is what Chloe wears). The tutu itself is 9.5" long. Click here to view my etsy store (this is all that's in it right now) you can place an order through Etsy, or send me an email to BuckeyeCreations@iCloud.com


That's all for now! Have a blessed day!


Blog Template by Delicious Design Studio